- Introduction and concept
- Standard procedure for installation of Phantosys client in a personal PC/Notebook
- Step 1 – Check the PC requirements
- Step 2 – Download the installation files and Login information
- Step 3 – Check or change your PC's BIOS settings
- Step 4 – Modify the existing disk partition scheme
- Step 5 – Install Phantosys Local Boot Manager on the PC
- Step 6 – Load the Phantosys Virtual disk image by USB local storage
- Step 7 – Boot the system
- How to switch to your original (personal) system
Introduction and concept
Phantosys concept of centralized management, easy updating, high security, self-healing, local processing autonomous systems, makes it a great choice for companies and schools to provide users with preset systems (that may include specific software and configurations) that can be transferred inside a Vdisk container, to be loaded on personal PCs and Notebooks, using only each PC’s computing power, and totally isolated from personal systems stored in local HD partitions.
On this guide, we provide a Standard Procedure for the installation of Phantosys in a personal PC/Notebook. The actual steps and commands may vary according to different PC brands and system versions.
Anyone who is not familiar with computer installation, changing BIOS settings, and HD partition configuration, should consider asking for support from their company/school.
Standard procedure for installation of Phantosys client in a personal PC/Notebook
Step 1 – Check the PC requirements
- Make sure that your PC/Notebook fits the recommended requirements to run a Windows10 64bit system
- Your PC must be UEFI compatible. You will need to enable the network/PXE boot, and disable Secure Boot.
- For the initial installation, your PC/Notebook must be connected by LAN cable to the network/Internet. Please note that Phantosys supports client operation on WiFi after the initial installation.
- Your Home/Office network must have a DHCP server (often the default setting for Home routers) to automatically provide an IP to the PC, and your network must be connected to the Internet, for the client PC to connect to the Phantosys server.
- If you need to preserve and keep access to the PC’s original system, check Step 4 and use with caution a disk partition tool to shrink existing partitions and free unallocated space at the end of the HD (100Gb suggested / 50Gb minimum). Phantosys local cache is installed on the unallocated area of the Hard Drive (or SSD).
Step 2 – Download the installation files and Login information
Note: Most of the downloads are compressed by 7zip
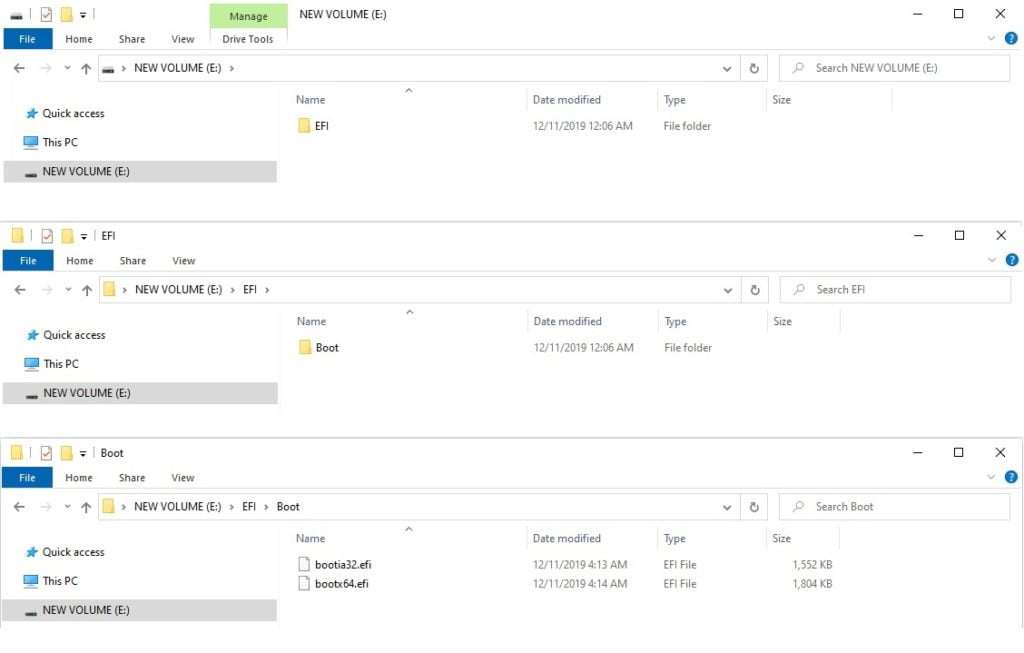
2.1. The EFI installation files, to be copied to a bootable USB drive, as the path shown on the below picture:
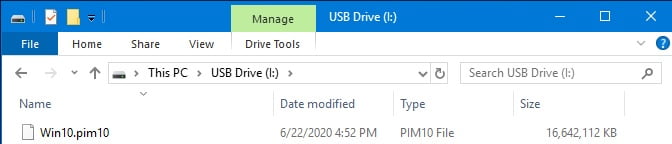
2.2. The Vdisk repository template file, to be copied to the ROOT position of a USB drive or external USB Hard drive. For a better copy performance, format the USB drive setting the cluster size to 64Kbytes.
2.3. The Login information, to register your PC (credentials, server IP, your PC hostname convention)
Step 3 – Check or change your PC’s BIOS settings
- Turn on your PC and enter the BIOS configuration area. This is done by pressing a specific key right after the PC is powered ON. Which key to press might be visible during the Power-ON POST messages, and depends on the PC manufacturer. DEL or F2 are common among the main brands. Here you can find a reference on how to boot into BIOS on different PC brands.
- The PC BIOS must be set as UEFI mode. PLEASE BE AWARE: If your PC is UEFI-compatible but currently set as Legacy Mode, switching the BIOS mode to UEFI will most likely cause any preinstalled system to become inaccessible for boot.
- Make sure to enable the network/PXE boot. Even though the network boot method will not be required on this installation method, the UEFI USB installer requires the network stack to be enabled.
- Disable Secure Boot.
Watch an example of BIOS configuration:
Step 4 – Modify the existing disk partition scheme
If you need to preserve the PC’s original system, use with caution a disk partition tool to shrink existing partitions and free unallocated space at the end of the HD (100Gb suggested / 50Gb minimum). Phantosys local cache is installed on the unallocated area of the Hard Drive (or SSD).
Watch an example – you can use the Disk Management tool on Windows to shrink the last partition and free unallocated space in the PC’s HD:
Step 5 – Install Phantosys Local Boot Manager on the PC
- Plugin the bootable USB drive that was created on Step 2.1, turn the PC on and make sure the boot order options are set to boot USB first, or use the appropriate command on your PC to choose the boot device.
- The EFI installer will connect your PC to the appointed Phantosys server IP (check Step 2.3)
- Enter the administrator credentials (check Step 2.3)
- Input your PC name to be registered as a new Phantosys client host (check Step 2.3)
- Confirm the operation and the Phantosys Boot Manager will be installed on your PC and the unallocated area of your HD will be formatted as the Local Cache
Step 6 – Load the Phantosys Virtual disk image by USB local storage
- Whilst logged on the server (PC must be online with the server) plugin the USB disk that contains the file copied as instructed on Step 2.2
- Enter the administrator credentials (check Step 2.3)
- On the first Logon, DO NOT CLICK ON ANY BOOT OPTION YET
- Press F3 to Load from USB the disk image file (the time to finish the copy process depends on the USB drive/port type and the size of the virtual disk file)
- Even if the status bar shows 99% it means the file is completely loaded
- Just restart the PC using the power button or CTRL+ALT+DEL
Step 7 – Boot the system
- Click on the menu entry and start a preset Windows system, running directly over your PC computing resources and peripherals
Watch this video to see Steps 5 to 7 in action:
How to switch to your original (personal) system
- If you are running the system loaded by Phantosys, just restart it, or power off the computer.
- Start your PC. When prompted at the Phantosys Menu, just select “Local boot” and your original/preinstalled system will be initialized.
- Note that when you use your personal system, you will not have access to the Phantosys system or any files from that system.


